Perler Beads Guide, Part 2: Get Your Own Digital Design
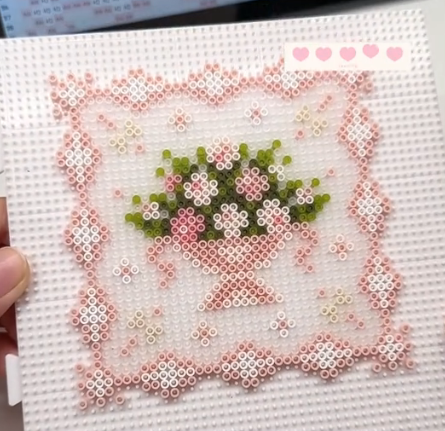
How to turn your own images into bead patterns, and how to prepare them so they look right on screen and export cleanly as PNG or PDF files. New to the craft? Start with Part 1, the basics.
1. Pattern-Making Software
Pixel Beads
Useful for:
- Converting an image into a bead grid
- Selecting a bead brand
- Limiting the palette
- Calculating quantities
- Exporting PNG
- Exporting PDF
- Working with Perler/Hama/Artkal references
A useful workflow is:
photo → actual bead pattern → shopping list
The site processes uploaded images locally in the browser.
PixelBeads (my favorite so far)
Useful for:
- Converting photos
- Custom palettes
- Tracking the colors you actually own
- Replacing colors
- Pattern editing
- Bead counts
A particularly useful concept is “my palette”: generate patterns based on the colors you actually possess instead of generating a pattern requiring dozens of colors you do not own.
2. Photo → Perler Workflow
Do not simply upload a photograph and accept whatever comes out.
Step 1: Crop. Remove irrelevant background.
Step 2: Choose dimensions. For example, 60 × 60 beads means 60 × 60 = 3,600 possible bead positions.
Step 3: Reduce colors. Instead of 47 colors, try around 12 to 20 colors for a simple design.
Step 4: Preview. Look at the pattern from a distance. Pixel art works because your eye combines neighboring pixels.
Step 5: Manually clean it. Fix:
- Weird isolated pixels
- Ugly outlines
- Accidental color noise
- Eyes
- Mouths
- Symmetry
- Background
Step 6: Have a quantity list. For example:
Black     312
White     198
Red       143
Pink       87
...
Now you know what you actually need before starting.
3. Don’t Use Photographs Blindly
A photo can work very well, but detailed photographs can become visual mush when converted to a low-resolution bead pattern. A photograph containing:
- Hair
- Grass
- Trees
- Shadows
- Reflections
- Tiny facial details
may need substantial simplification. For photos, composition matters more than color accuracy. A recognizable silhouette with 15 colors is often better than a technically accurate 50-color conversion.
4. Use Pixel Art as Your Source Material
This is often easier than converting photographs. Look for:
- Pixel art
- Sprite sheets
- 8-bit art
- 16-bit art
- Pixel icons
- Game sprites
Then convert that to beads. You are effectively doing:
pixel → bead
instead of:
photograph → pixel → bead
which removes an entire layer of difficulty.
5. Pinterest / Instagram / Etsy Search Terms
Search using multiple terms because different regions and communities use different names. Useful searches:
perler beads
perler bead pattern
hama beads
hama bead pattern
fuse bead pattern
iron bead pattern
pixel bead pattern
melty bead pattern
artkal pattern
5mm fuse beads
Searching only for “Perler beads” can limit your results by a ton.
Missing the ironing side of things? Head back to Part 1, the basics.
And the most important thing: have fun creating!